|
 |
|
|
Question :
How do I transfer pictures and movies from the camera to a computer using OLYMPUS Viewer 3? ( Library view )
Answer:
The following procedure explains how to transfer pictures and movies from your camera to a computer using the Library view of OLYMPUS Viewer 3.
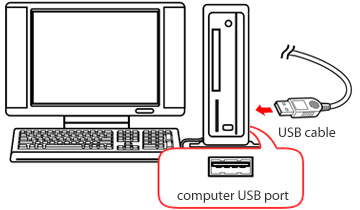
- Connect the camera to a computer using the bundled USB cable.
Note:
To transfer pictures from the internal memory, remove the media card, such as SD card or xD Picture Card, from the camera before connecting the camera to the computer. When a memory card is in the camera, the internal memory cannot be read.
The USB cable should be plugged directly into a computer USB port and not into a USB hub. If the camera is connected to the computer via a USB hub, it may not operate correctly.
Insert the bundled USB cable into a USB port on your computer.
Insert the other end of the USB cable into the camera.
*Turn off the camera before inserting the USB cable.
If the selection screen appears on the LCD monitor, select PC or Storage and press the [ OK ] button.
* The display varies based on the camera.
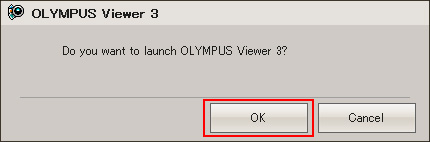
- The following window is displayed when the computer recognizes the camera. Click OK to proceed.
When OLYMPUS Viewer 3 does not start automatically even after connecting your camera to the computer
Double-click the OLYMPUS Viewer 3 icon on the Start menu ( Windows ) , Dock ( Macintosh ) or the desktop.

The icon on desktop ( Windows )
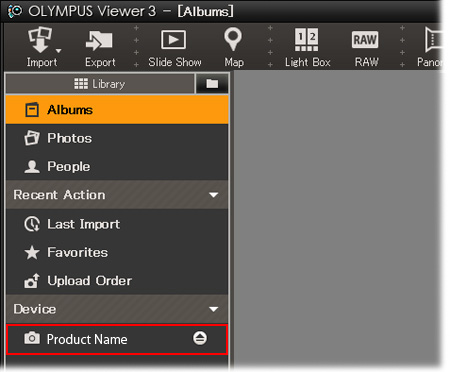
- When OLYMPUS Viewer 3 is launched, click the camera model in Device.
- The pictures and movies on the camera will be displayed.
Note:
- The following describes what the icons on the images mean:

* The icon for the already transferred image is displayed only in Windows.
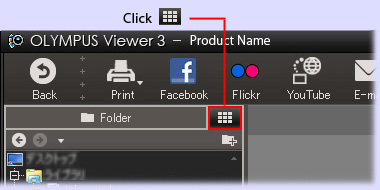
- Click
 to change the Folder view to Library view. to change the Folder view to Library view.
|
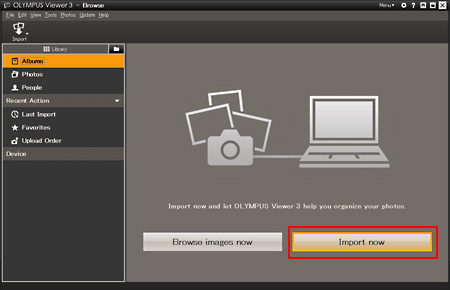
When you first import pictures or movies using OLYMPUS Viewer 3
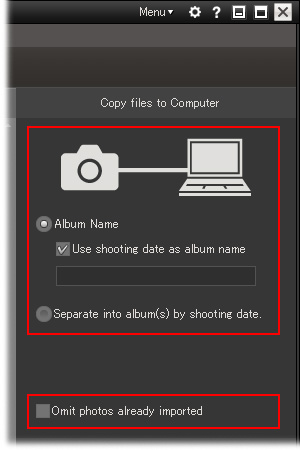
The following window is displayed when you first import pictures or movies in Library view of OLYMPUS Viewer 3.
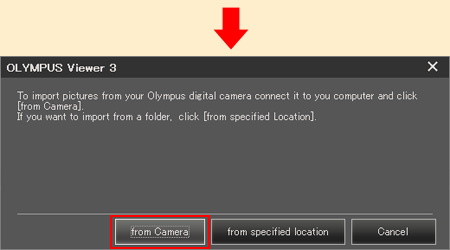
When you click Import now, a pop-up window will be displayed. Click from camera and then follow procedure 4.
* This window is not displayed after the second time of import.
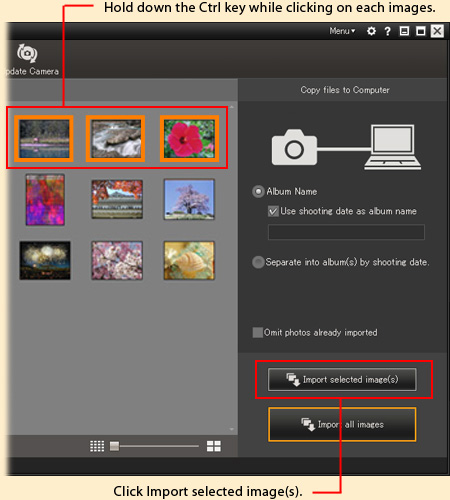
- Enter an album name.
- Select Album Name. If the Use shooting date as album name check box is selected, the shooting date becomes the album name.
To enter an original album name, clear the Use shooting date as album name check box and enter an album name into the blank field.
If the Separate into album(s) by shooting date check box is selected, albums are created by shooting date. You can enter an original album name to the thumbnail of each albums.
- To prevent the transfer of already transferred images, select Omit photos already imported. (Windows version only)
Note:
You can also change the album name after importing the pictures and movies.
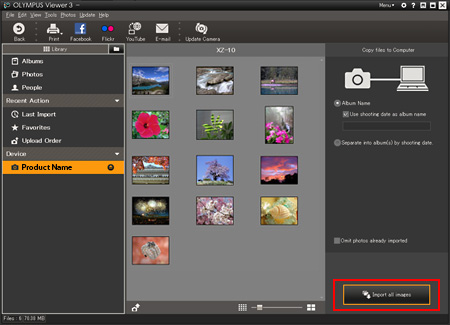
- When you click Import all images, the pictures and movies will be transferred to your computer.
Tips:
To transfer selected pictures or movies, hold down the [ Ctrl ] key ( [ Command ] key for Macintosh ) on the keyboard while clicking on each images and click Import selected image ( s ).
The selected pictures and movies are displayed in orange frames.
- The following window will be displayed when the image transfer is complete. Click Browse images now to view the images.
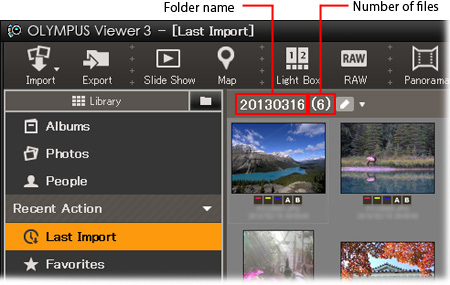
- The transferred pictures and movies will be displayed in Last Import.
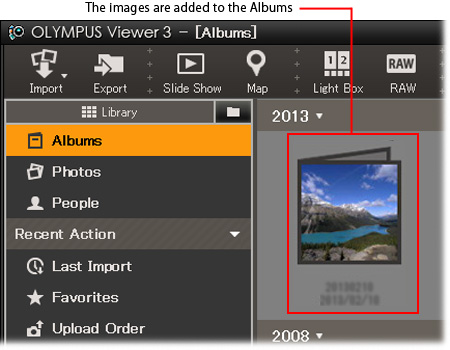
- If you click Albums, the pictures and movies are added.
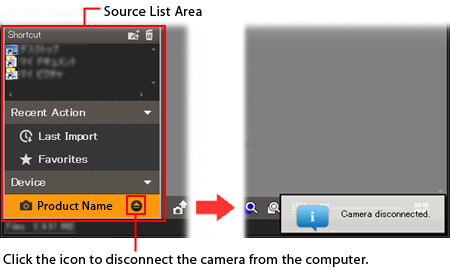
- To disconnect the camera from the computer, click the
 icon next to the model name in Device. icon next to the model name in Device.
The model name in Device disappears and a message appears on the lower right corner, indicating that the camera can be disconnected. Disconnect the USB cable from the camera.
*The pop-up window will not appear in Macintosh.
|
|


![If the selection screen appears on the LCD monitor, select PC or Storage and press the [ OK ] button.](/en/support/imsg/digicamera/qa/contents/ov3/img/ov3_a5_03.jpg)