Initial setup
After turning the camera on for the first time, perform the initial setup by choosing a language and setting the camera clock.
- Date and time information is recorded on the card together with the images.
- The file name is also included with the date and time information. Be sure to set the correct date and time before using the camera. Some functions cannot be used if the date and time have not been set.
-
Press the Q button when the initial setup dialog is displaying prompting you to choose a language.
-
Highlight the desired language using the control dial or the FGHI buttons on the arrow pad.
Cursor
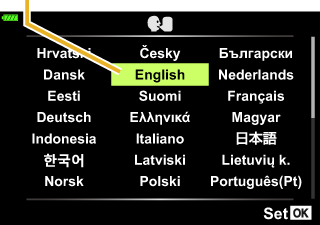

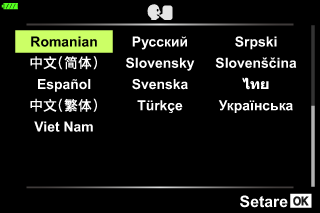
- The language-selection dialog has two pages of options. Use the control dial or the FGHI buttons on the arrow pad to move the cursor between pages.
-
Press the Q button when the desired language is highlighted.
- If you press the shutter button before pressing the Q button, the camera will exit to shooting mode and no language will be selected. You can perform the initial setup by turning the camera off and then on again to display the initial setup dialog and repeating the process from Step 1.
-
The language can be changed at any time from the e setup menu.
-
Set the date, time, and date format.
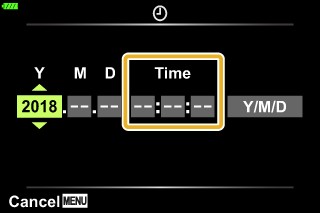
The time is displayed using a 24-hour clock.
- Use the HI buttons on the arrow pad to highlight items.
- Use the FG buttons on the arrow pad to change the highlighted item.
-
The clock can be adjusted at any time from the e setup menu.
-
Complete the initial setup.
- Press the Q button to set the clock.
- If the battery is removed from the camera and the camera is left for a while, the date and time may be reset to the factory default setting.
-
You may also need to adjust the frame rate before shooting movies.
Turning the camera off
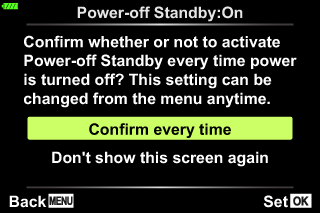
Press the ON/OFF button to turn the camera off. See "Wireless Settings for When the Camera Is Off" for information on how to proceed if the camera displays the dialog shown in the illustration.
gWireless Settings for When the Camera Is Off