|
|||||||||||
|
Question : Answer:
- Saving the camera settings to the computer (Step 10) - Updating the firmware of the camera (Step 10 to 11) - Reloading the camera settings (Step 12) Camera settings are reset depending on the camera model and current firmware version. When updating the firmware of the camera using OM Workspace, the camera settings are saved to the computer before the updating starts and reloaded to the camera after the update. To update the firmware of your camera, follow the instructions below:
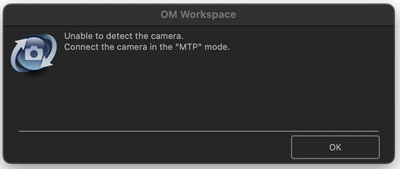
The following procedure explains how to update the firmware for your camera using the latest OM Workspace, version 2.4 as of November 2025. < step 1 > Connect the camera to your computer using the bundled USB cable.If the selection menu for USB connection mode is displayed on the camera monitor, select either MTP or Storage depending on your camera's current firmware version, then press [OK]. 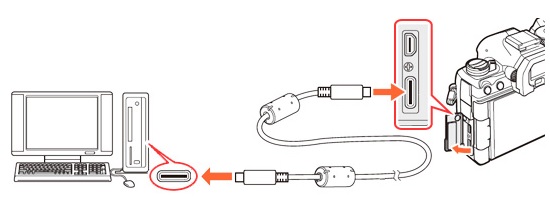 < 1-a > When your camera's current firmware version is 1.6 or later: Select MTP and press the camera's [OK] button to continue. 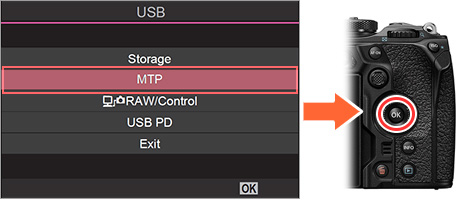 < 1-b > When your camera's current firmware version is between version 1.0 and 1.5: Select Storage and press the camera's [OK] button to continue. 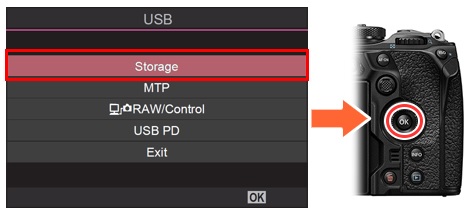
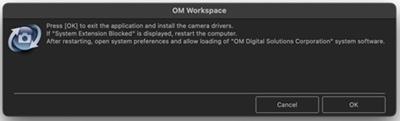
< step 2 > Double-click the "OM Workspace" icon. < step 3 > In Camera, click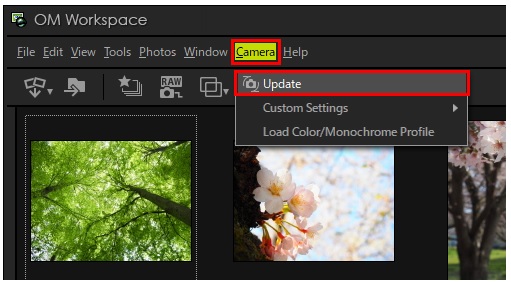 * If the User Account Control window is displayed, click Yes to proceed the installation.
< step 4 > The OM Workspace updater starts.The updater checks via Internet if newer firmware versions are available. Click Next to proceed. 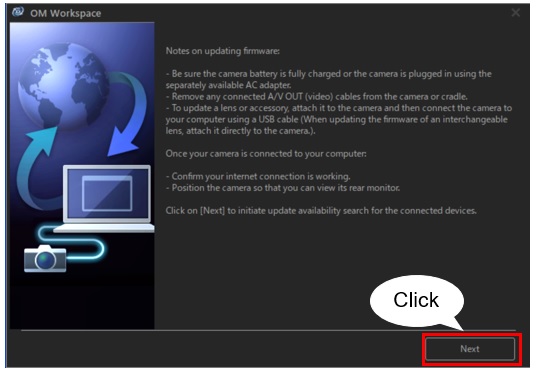 Proceed to step 8 if the current OM-1 firmware version is 1.1, 1.2, 1.3, 1.4, 1.5, 1.6, 1.7, 1.8.
Proceed to step 5 if the current OM-1 firmware version is 1.0.
< step 5 > *The following window will be displayed when updating the firmware from version 1.0.The camera automatically restarts for the update. Click OK to restart the camera. Do not disconnect the USB cable from the camera. 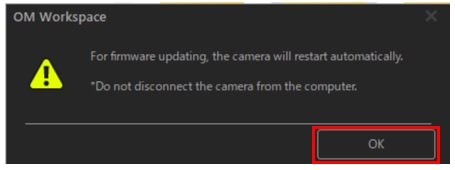 < step 6 > *The following window will be displayed when updating the firmware from version 1.0.You will see a message prompting you to check the camera's monitor. 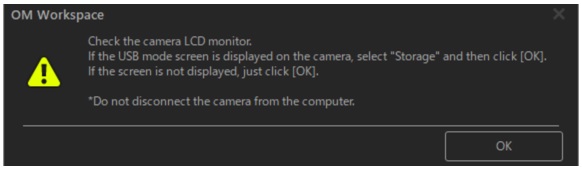 Depending on what you see on the camera monitor, proceed to either of the following steps: < 6-a > · If the selection menu for USB connection is displayed Select Storage and press the camera's [OK] button to continue. Proceed to step 7. 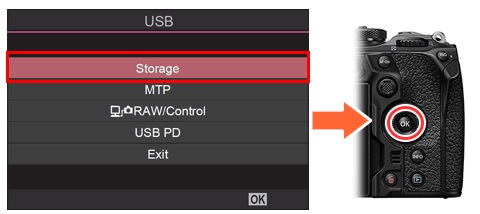 < 6-b > · If the selection menu for USB connection is not displayed Proceed to step 7.
< step 7 > *The following window will be displayed when updating the firmware from version 1.0.Check the status of the camera's monitor display and click OK. 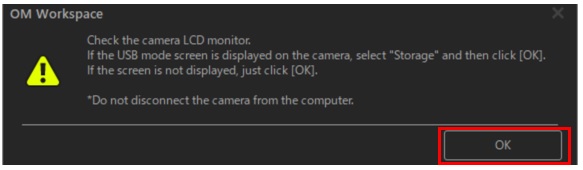 < step 8 > If newer firmware versions are available, they will be displayed in a dialog box.To see what will be changed by applying an update, select it from the list and click Details. To apply a selected firmware update, click Update and then, on the next screen, Yes. (If you click No, the update will be canceled.) 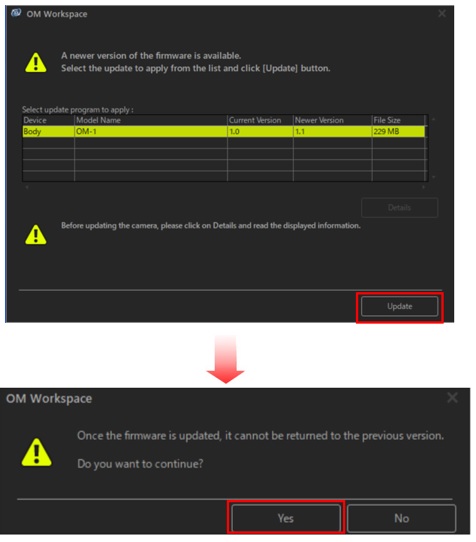 < step 9 > Carefully read the Software License Agreement. If you accept the terms, click Agree to proceed. < step 10 > The current camera settings will be saved to the computer, and then the new firmware will be downloaded to the computer and transferred to your camera to proceed the update. < 10-1 >
Click OK to start saving the camera settings to the computer. Check the progress on the window in OM Workspace (PC side) and the monitor display on the camera. 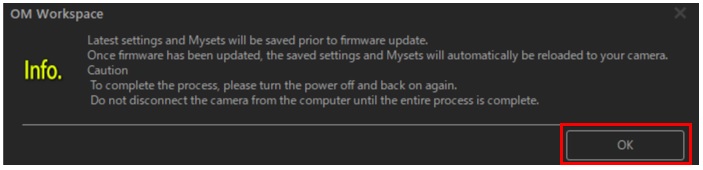
Caution: Display on the camera monitor during update No information is displayed on the camera monitor while saving the settings or transferring the firmware. Please wait for a while until the camera displays the updating screen (screen shown in step 10-5). Never turn off the camera or disconnect the USB cable. The camera is not frozen or having problems.< 10-2 > The current camera settings are saved to the OM Workspace (computer). The following window will change to the next in a few seconds. 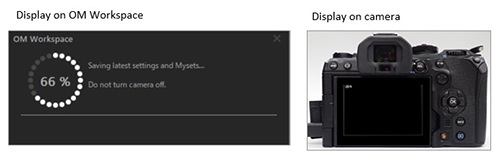 < 10-3 > The new firmware is transferred to the camera. The following window will change to the next from a few tens of seconds to a minute, depending on the speed of your Internet connection. 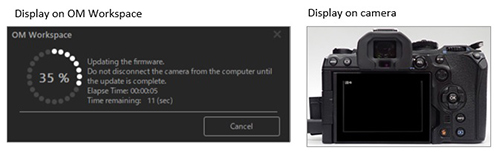 < 10-4 > The new firmware is transferred to the camera. The following window will change to the next in about 30 seconds on Windows and about 3 minutes on macOS. 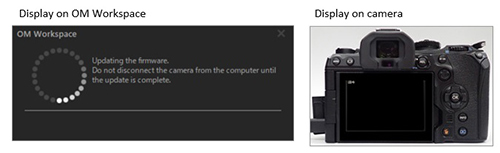 < 10-5 > After the firmware is transferred to your camera, the update starts in your camera. The display changes as in the following image. Wait until the digital camera's LCD displays "OK". It takes about 5 minutes. 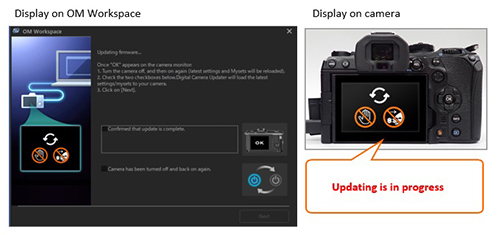 Caution: Do not disconnect the camera from the computer until the LCD on the camera displays "OK".The firmware update is not complete until the camera displays "OK". Disconnecting the camera before the firmware update completes may render the camera inoperable. < 10-6 > The firmware update is completed when the digital camera's LCD displays "OK". Leave the USB cable connected to the camera and computer. The display on OM Workspace remains as in the following image. Do not perform any operation at this point and proceed to step 11. 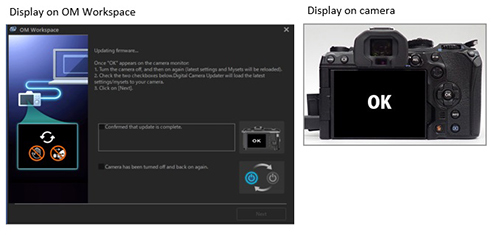 < step 11 > The firmware update is completed when the digital camera's LCD displays "OK".Leave the USB cable connected to the camera and computer. Turn the camera to Off using the power lever, and then to On again. 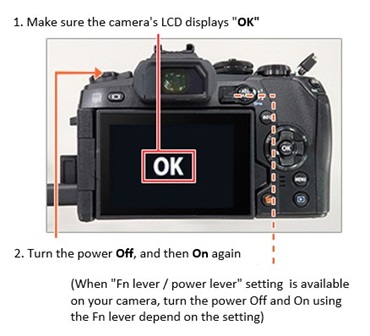
< step 12 > The camera settings, saved in step 10, are reloaded to the camera. Select the check boxes in the OM Workspace display ("Confirmed that update is complete.", "Camera has been turned off and back on again."), and then click Next (*). The camera settings are reloaded from the computer to the camera.*Next can be clicked after the two check boxes are selected. 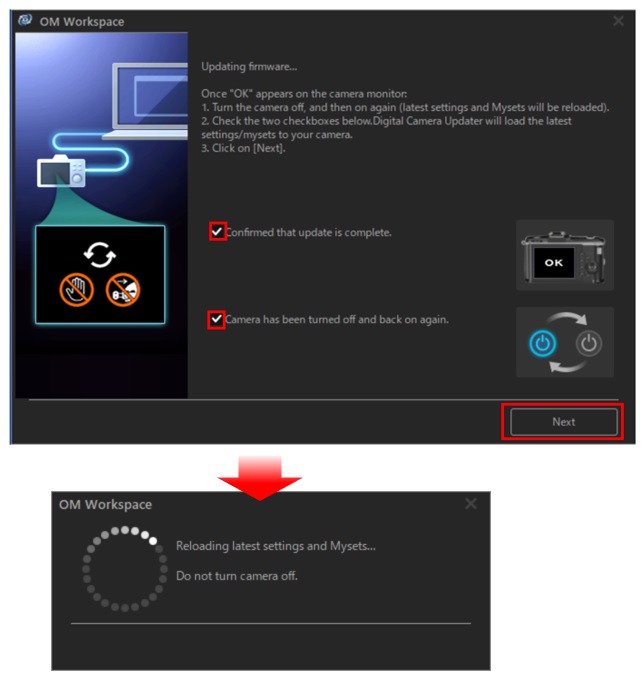 < step 13 > Firmware update is complete. Click Close.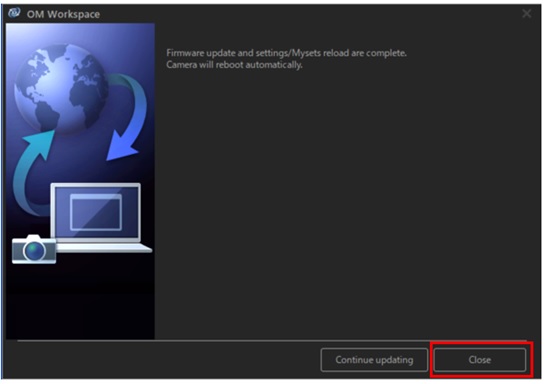 Note:
When updating the firmware from version 1.6 or earlier to version 1.9, the camera settings (including date and time) will be reset, and the display language will be changed to English. Camera settings will be retained when updating the firmware from version 1.7 or 1.8 to version 1.9. |
||||||||||||||||||||||||||||||||
 |