Shooting automatically with a fixed interval (Intrvl. Sh./Time Lapse)
You can set the camera to shoot automatically with a set time lapse. The shot frames can also be recorded as into a single movie. This setting is only available in P/A/S/M modes.
-
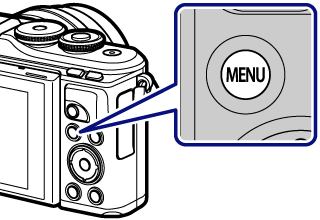
Press the MENU button to display the menus.
-
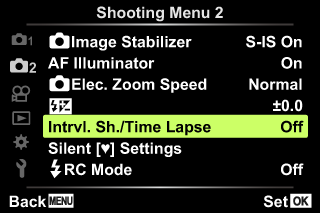
Highlight X Shooting Menu 2 using FG and press the Q button.
-
Highlight [Intrvl. Sh./Time Lapse] and press the Q button.
-
Select [On] and press the I.
-
Adjust the following settings and press the Q button.
- Number of Frames
- Sets the number of frames to be shot.
- Start Waiting Time
- Sets waiting time before starting to shoot.
- Interval Length
- Sets interval between shots after shooting starts.
- Time Lapse Movie
-
Sets recording format of frame sequence.
[Off]: Records each frame as a still picture.
[On]: Records each frame as a still picture and generates a single movie from the frame sequence.
- Movie Settings
-
[Movie Resolution]: Choose a size for time lapse movies.
[Frame Rate]: Choose a frame rate for time lapse movies.
- The starting and ending times shown in the display are intended as a guide only. The actual times may vary with shooting conditions.
-
The [Off]/[On] options will be displayed once more; confirm that [On] is highlighted and press the Q button again.
-
Shoot.
- Frames are shot even if the image is not in focus after AF. If you wish to fix the focus position, shoot in MF.
-
[Rec View] operates for 0.5 seconds.
- If either of the time before shooting, or shooting interval is set to 1 minute 31 seconds or longer, the monitor and camera power will turn off after 1 minute. 10 seconds before shooting, the power will automatically turn on again. When the monitor is off, press the ON/OFF button to turn it on again.
-
If the AF mode is set to [C-AF] or [C-AF+TR], it is automatically changed to [S‑AF].
- Touch operations are disabled during time lapse shooting.
- Bulb, time, and composite photography are not available during time lapse photography.
- The flash will not work if the flash charging time is longer than the interval between shots.
- If any of still pictures are not recorded correctly, the time lapse movie will not be generated.
- If there is insufficient space on the card, the time lapse movie will not be recorded.
-
The following cancel time-lapse shooting:
using the mode dial, MENU button, q button, or lens-release button; connecting a USB cable; turning the camera off
- If there is not enough charge left on the battery, the shooting may end partway through. Make sure the battery is charged enough before shooting.
- Movies recorded with [4K] selected for [Movie Settings] > [Movie Resolution] may not display on some computer systems. More information is available on the OLYMPUS website.